Landships II

Members Login
Username 
 
Password 
    Remember Me  
Post Info TOPIC: Hedi in 1/72


Captain

Status: Offline
Posts: 98
Date:
Hedi in 1/72
Permalink   


hedi_00.JPG

I bought a resin kit of Hedi.


hedi_01.JPG

It seemed Ok compared to pictures. One can see that it is based on parts from Emhar's A7V kit.


hedi_02.JPG

I had seen that there were a couple of things that needed to be fixed. The doors should actually be flush with the hull sides and I could have let it pass but the hinges are placed incorrectly on one side of the body. I was impressed by the handles at the doors though.


hedi_03.JPG

However, I discovered that the "turrets" in the corners are too low and I felt that it was too much work to trying to fix that. It was time to bring out some plastic card.


hedi_04.JPG

Coming this far, everything felt wrong. Things do not fit together.


hedi_05.JPG

Only one thing to do. Tear it apart. New sides are made.


hedi_06.JPG

I didn't want to make new fronts so I had to splice in plastic instead. Now new roofs must be made.


hedi_07.JPG

The "guillotine" is a great help in cutting multiple parts for the grilles in the roof.


hedi_08.JPG

But things still don't fit so everything is torn apart and new fronts can be manufactured. Now nothing will remain of that first attempt.

Time to tear down the the other end and rebuild it.


-- Edited by Orso on Tuesday 27th of April 2021 02:47:06 AM

__________________

Björn

https://baecklund.eu/scalemodels/home.html


PDA


Legend

Status: Offline
Posts: 1486
Date:
Permalink   

Very impressive. I am always amazed at how modelmakers cut so accurately; whenever I try to scratchbuild I cannot make such neat and precise cuts.


__________________


Captain

Status: Offline
Posts: 98
Date:
Permalink   

PDA wrote:

I cannot make such neat and precise cuts.


 And that is why I have remade parts three times biggrin


__________________

Björn

https://baecklund.eu/scalemodels/home.html


Captain

Status: Offline
Posts: 98
Date:
Permalink   

Is there any German machine guns to be found in 1/72 other than the ones in the Emhar A7V?

__________________

Björn

https://baecklund.eu/scalemodels/home.html


PDA


Legend

Status: Offline
Posts: 1486
Date:
Permalink   

I can find one or two German MGs for aircraft; check out Gas Patch models. Other than that there are MG08s in a few of the 'toy soldiers' boxes, but the quality may not be up to your standards. I can see Vickers MGs and wonder if the difference would be very noticeable.


__________________


Captain

Status: Offline
Posts: 98
Date:
Permalink   

Gas Patch has been on my mind but I need to fill all of the cooling slits and that goes for all of the aircraft guns that I found.


__________________

Björn

https://baecklund.eu/scalemodels/home.html


Sergeant

Status: Offline
Posts: 46
Date:
Permalink   

A company called Paragon Designs used to produce MG 08s in 1/72, but I don't think they're available any longer unfortunately.

https://www.scalemates.com/kits/paragon-designs-7220-8-x-spandau-machine-guns--1218436

Kevin


__________________


Captain

Status: Offline
Posts: 98
Date:
Permalink   

hedi_09.JPG

Working on the grills on the roofs.


__________________

Björn

https://baecklund.eu/scalemodels/home.html


Captain

Status: Offline
Posts: 98
Date:
Permalink   

hedi_10.JPG
The kit is quite sad when you start to look at it more closely. The roof is sagging, it is generally poorly cast and requires a lot of putty, which means that the details would disappear if you go for it.


hedi_11.JPG
Therefore, I continue on my path.


hedi_12.JPG
My intension were to use the chassis from the kit but the wheels sat higher at one end so I started to wonder if I made a mistake in the construction of the body. It turned out that the chassis is banana-shaped.


hedi_13.JPG
The casting of the track unit is not nice


hedi_14.JPG
and it leans. So I need to find another Emhar kit.


__________________

Björn

https://baecklund.eu/scalemodels/home.html


PDA


Legend

Status: Offline
Posts: 1486
Date:
Permalink   

Your work is amazing! Maybe you could make a mould from your model and sell your own Hedi kits.


__________________


Captain

Status: Offline
Posts: 98
Date:
Permalink   

The thought has crossed my mind offering it without chassis and machine guns as a "conversion" for the Emhar kit but I think it will be to much work.

hedi_15.JPG
This is probably the most frustrating thing that I ever tried to build. I finish something and it looks right but then you turn it and look at it from another angle and it look all wrong.

hedi_16.JPG
But it will never be correct. I just have the incorrect kit, a few pictures and a drawing that also has some faults as sources for the build.
First turret in the corners is in place.


__________________

Björn

https://baecklund.eu/scalemodels/home.html


Captain

Status: Offline
Posts: 98
Date:
Permalink   

hedi_17.JPG

It is funny that while it is a frustrating build it is a build without big problems. Only many small ones.


hedi_18.JPG

Second corner done. It has a different opening than the first.


__________________

Björn

https://baecklund.eu/scalemodels/home.html


Captain

Status: Offline
Posts: 98
Date:
Permalink   

hedi_19.JPG

While waiting for the new kit to arrive I redirect a chassis from one of the other five A7V's that I'm building to this one.


hedi_20.JPG

With all four corners ready I need to adapt the hull to the chassis to get the right height.


__________________

Björn

https://baecklund.eu/scalemodels/home.html


Lieutenant

Status: Offline
Posts: 53
Date:
Permalink   

excellent work so far. I am saving your data in case I have the will later!

Tony


__________________


Captain

Status: Offline
Posts: 98
Date:
Permalink   

I now have the lower front plates in place so the body is rather stable to handle. At the moment I am cutting all the holes for the MG-openings. I am not happy with the doors not being flush with the side walls. I know that I must fix this but I also know I will mess it up so it will look awful.

__________________

Björn

https://baecklund.eu/scalemodels/home.html


Captain

Status: Offline
Posts: 98
Date:
Permalink   

hedi_21.JPG

Not a lot has happened since the last post. The summer mean less time for modelling. I have at least cut all the holes in the body.


 hedi_22.JPG

I also started to add some hatches in some of the openings. Time to start on some details.


__________________

Björn

https://baecklund.eu/scalemodels/home.html


Ned


Brigadier

Status: Offline
Posts: 292
Date:
Permalink   

Great work! Looking forward to next steps


__________________


Captain

Status: Offline
Posts: 98
Date:
Permalink   

hedi_23.JPG

After a four month brake it is back on track


hedi_24.JPG

I have most of the details done but I messed up in the front.

The tow shackles and their covers should have been placed more to the centre.


hedi_25.JPG

I'm not sure if I should close more of the gun ports or not, I need to add holes for the exhausts before I start on the rivets


__________________

Björn

https://baecklund.eu/scalemodels/home.html


Captain

Status: Offline
Posts: 98
Date:
Permalink   

hedi_26.JPG

hedi_27.JPG

hedi_28.JPG

hedi_29.JPG

Rivets needed. Lots of them.


__________________

Björn

https://baecklund.eu/scalemodels/home.html


Sergeant

Status: Offline
Posts: 46
Date:
Permalink   

It's looking very good 👍

__________________


Captain

Status: Offline
Posts: 98
Date:
Permalink   

hedi_30.JPG

I added a first coat of paint so it is ready for some rivets.


__________________

Björn

https://baecklund.eu/scalemodels/home.html


Captain

Status: Offline
Posts: 98
Date:
Permalink   

hedi_31.JPG


I have now started on rivets.


__________________

Björn

https://baecklund.eu/scalemodels/home.html


Ned


Brigadier

Status: Offline
Posts: 292
Date:
Permalink   

Looks great!!


__________________


Captain

Status: Offline
Posts: 98
Date:
Permalink   

hedi_32.JPG

The project goes on slowly. Just one side left to do.


__________________

Björn

https://baecklund.eu/scalemodels/home.html


Ned


Brigadier

Status: Offline
Posts: 292
Date:
Permalink   

You're inspiring me to finish mine.. excellent work..


__________________


Captain

Status: Offline
Posts: 98
Date:
Permalink   

hedi_33.JPG
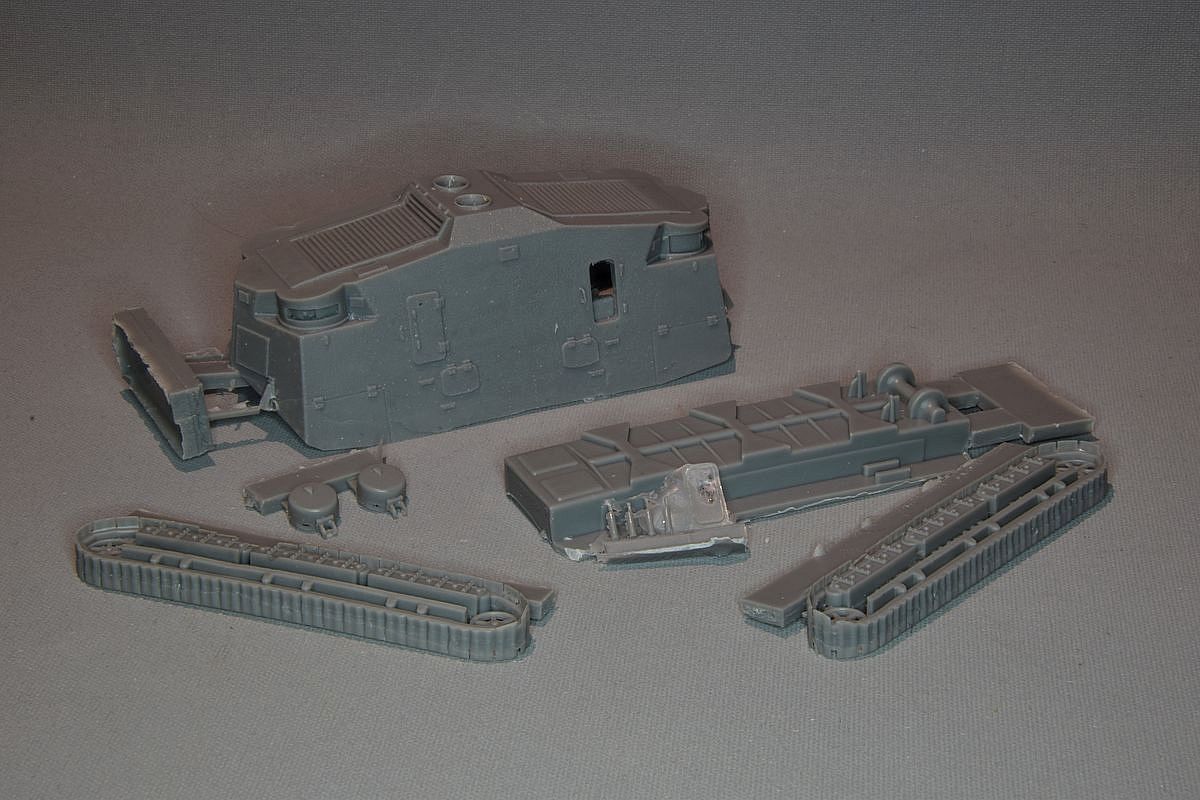
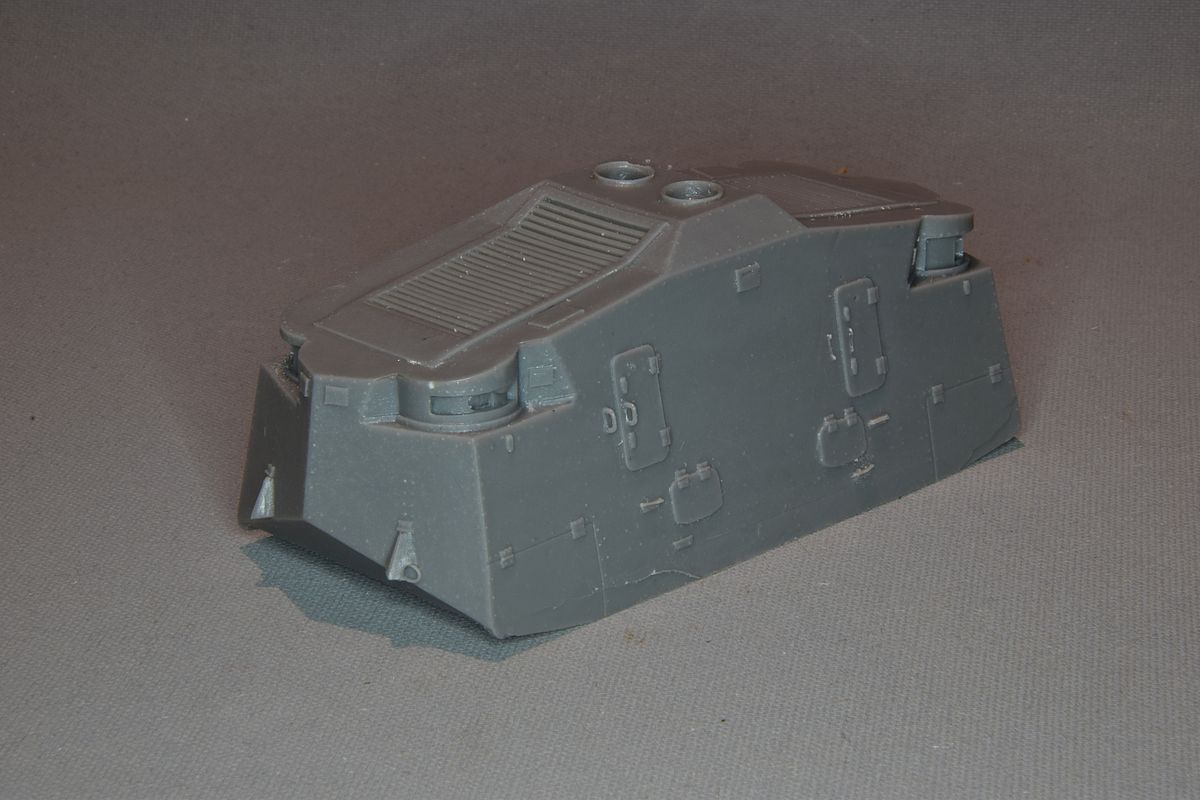
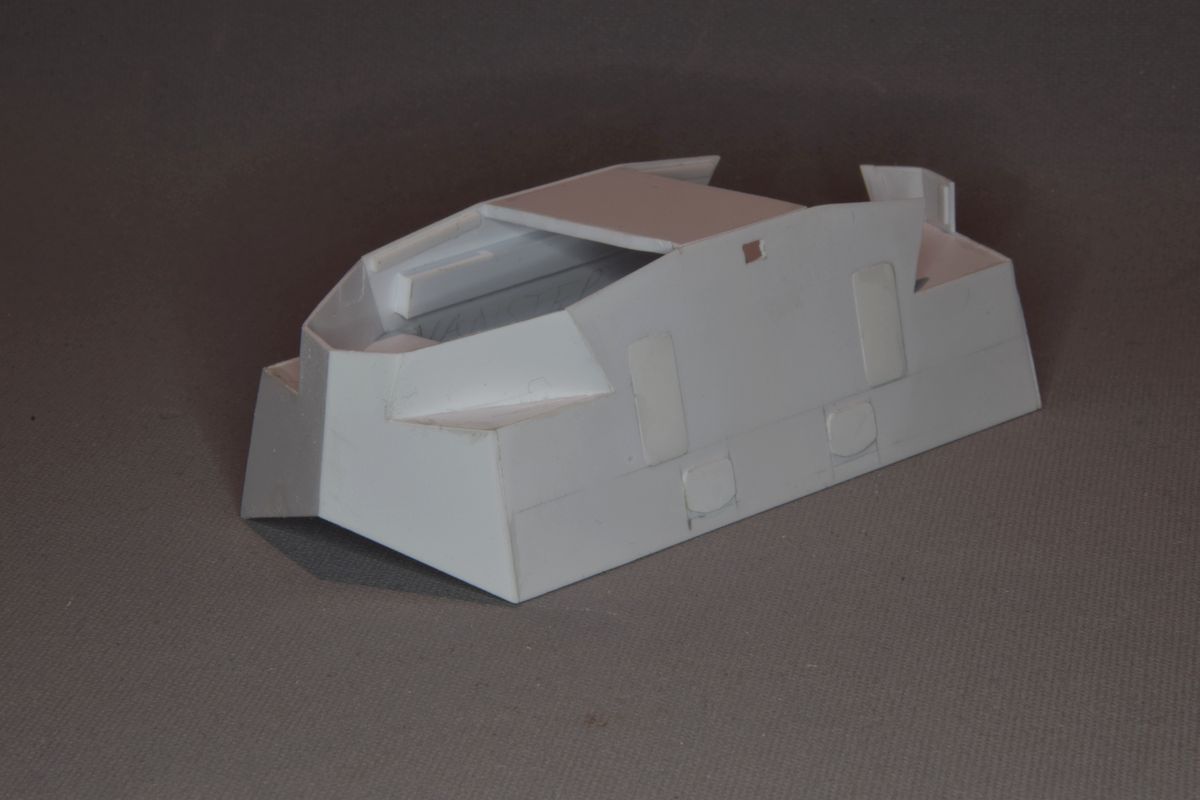
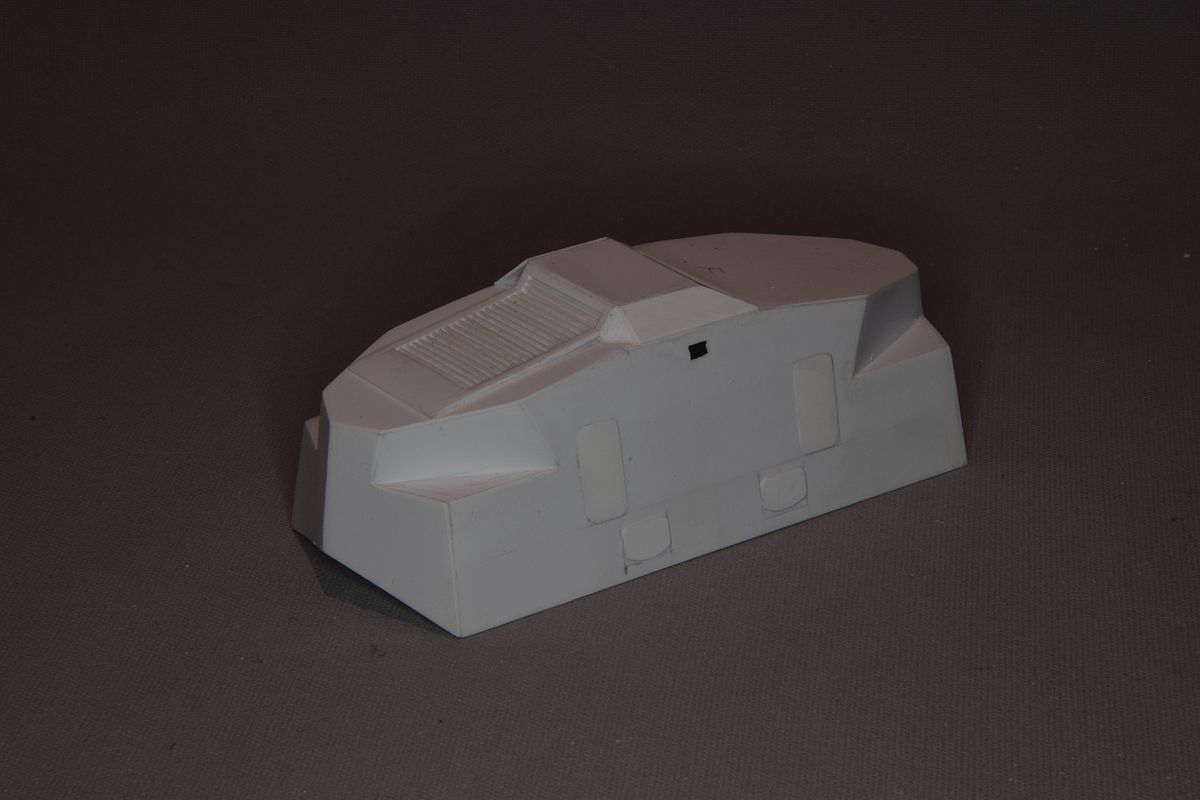
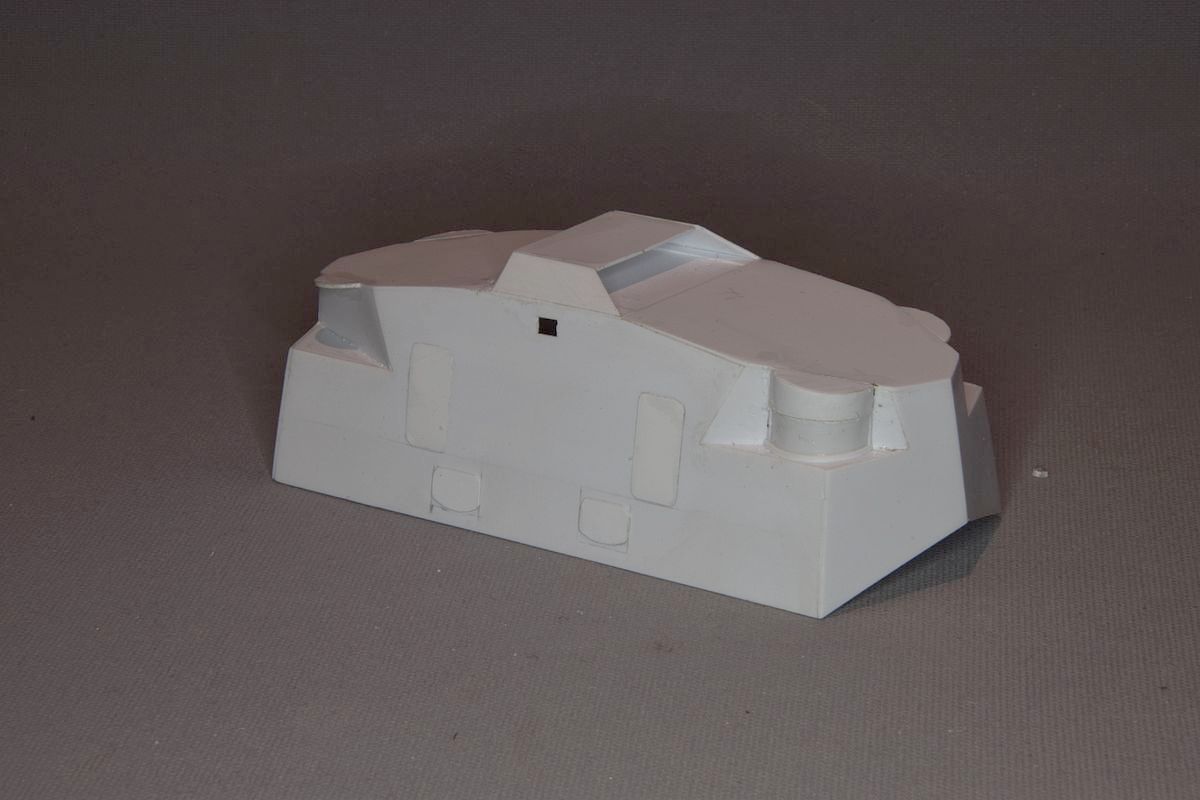
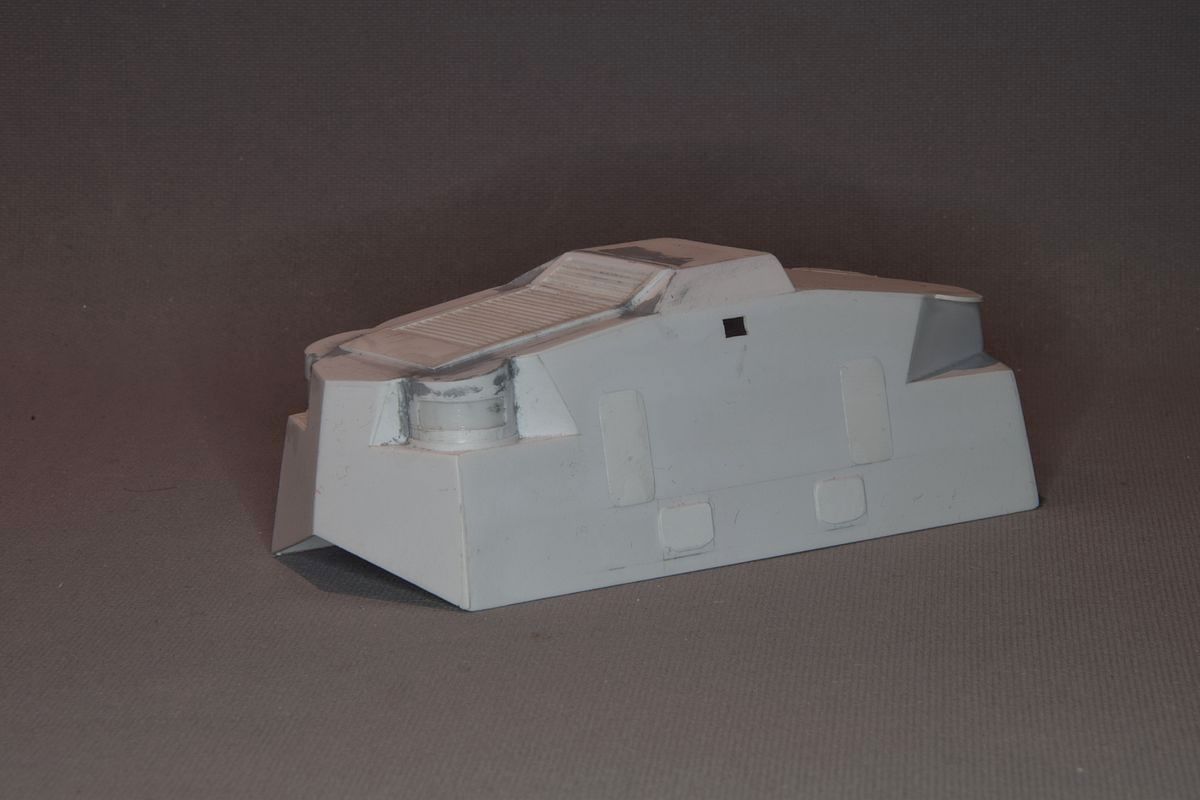
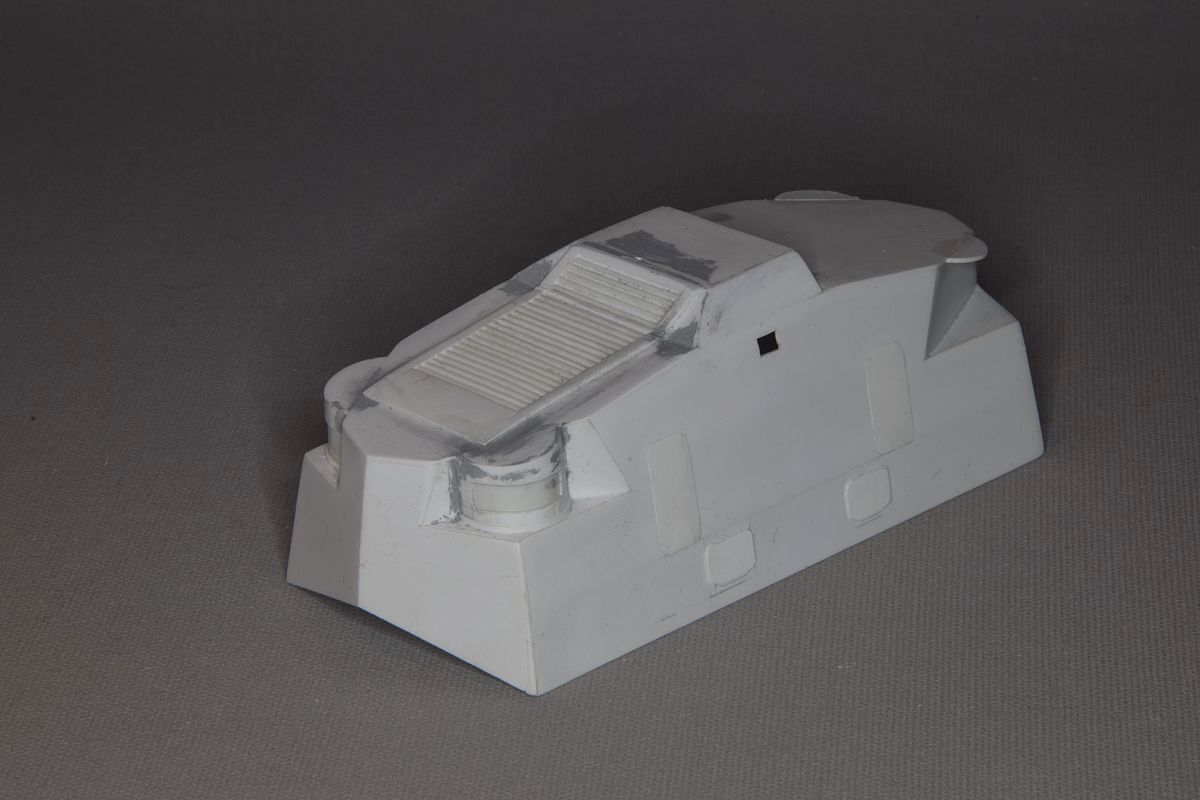
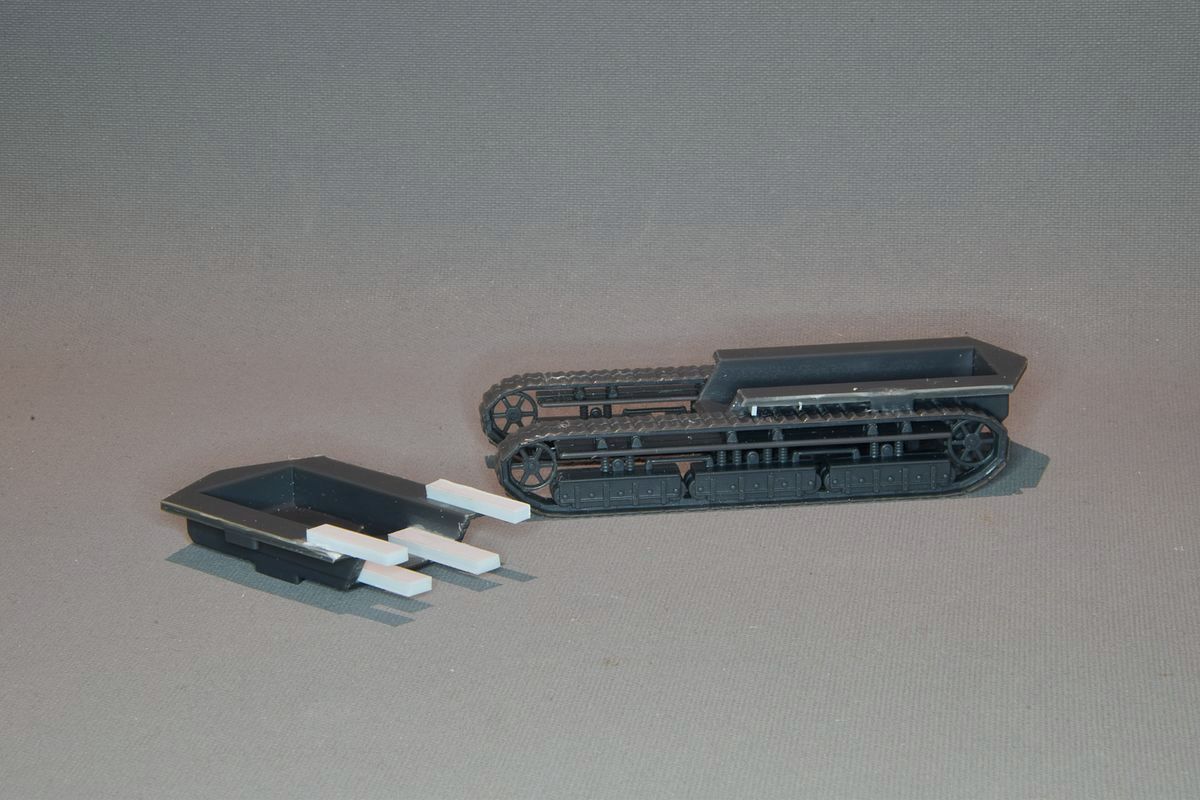
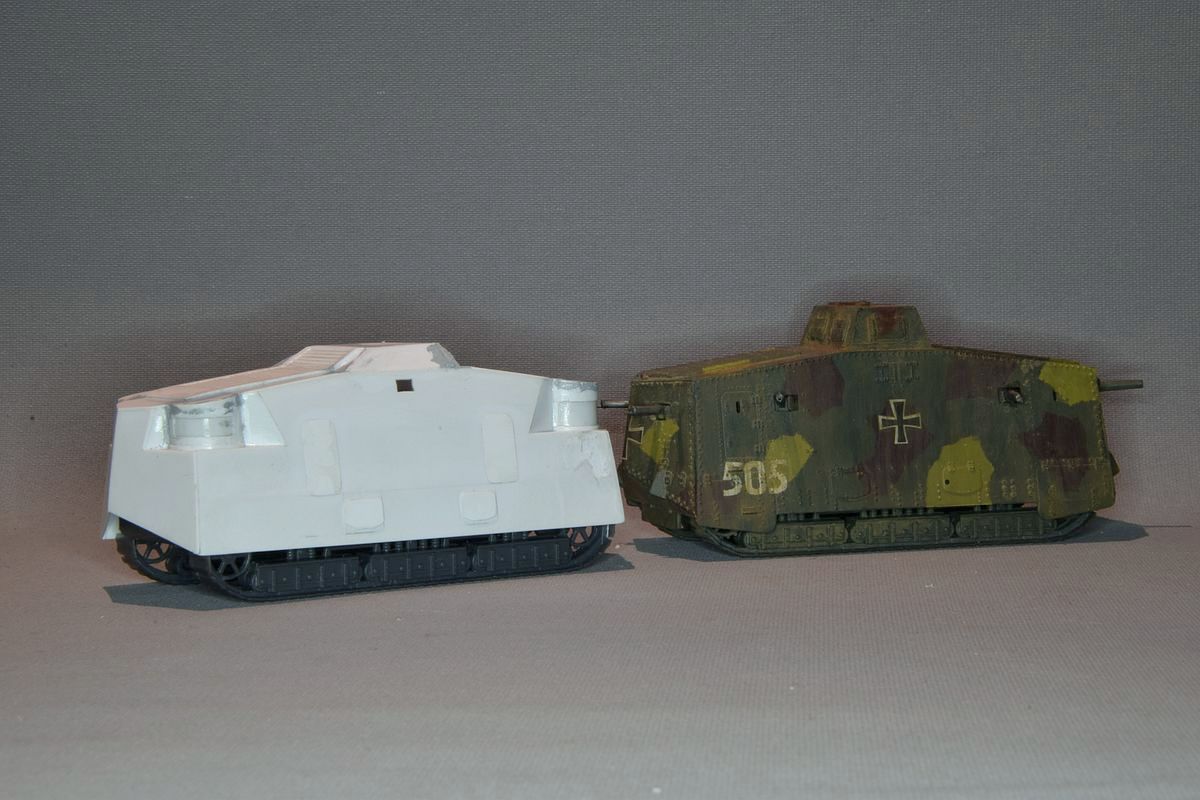
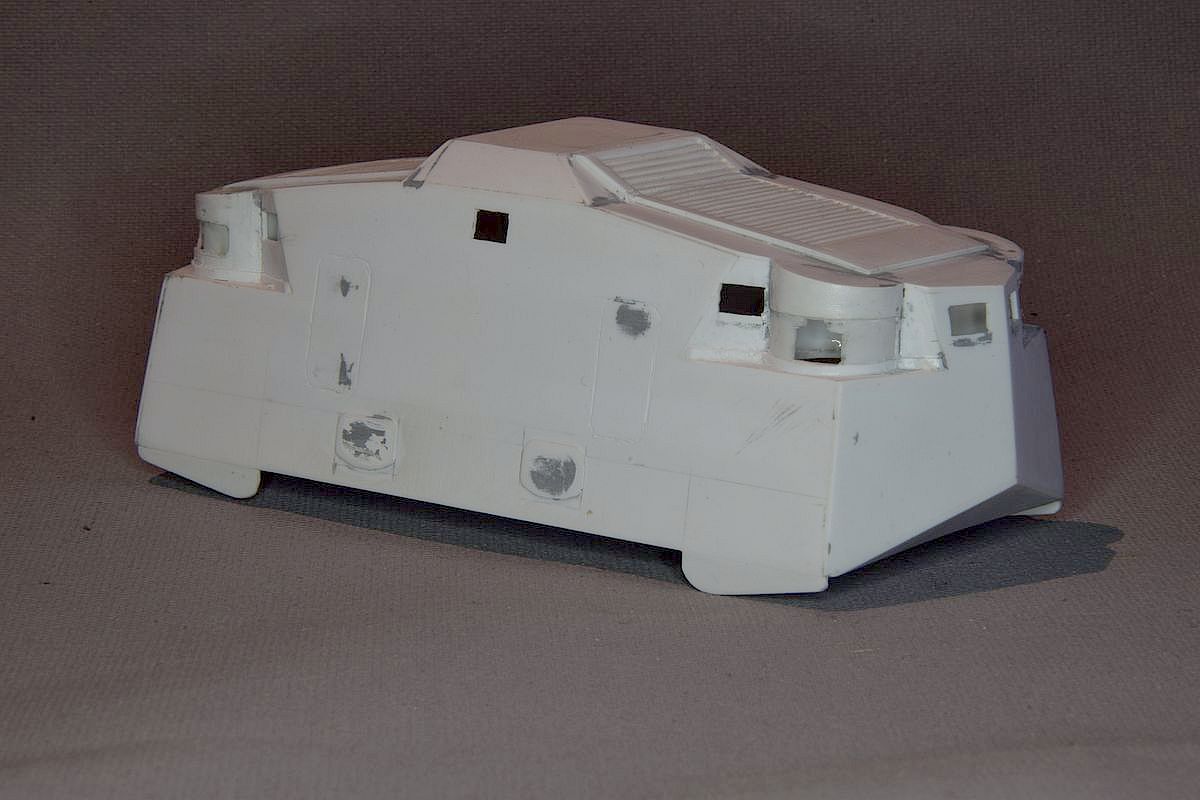
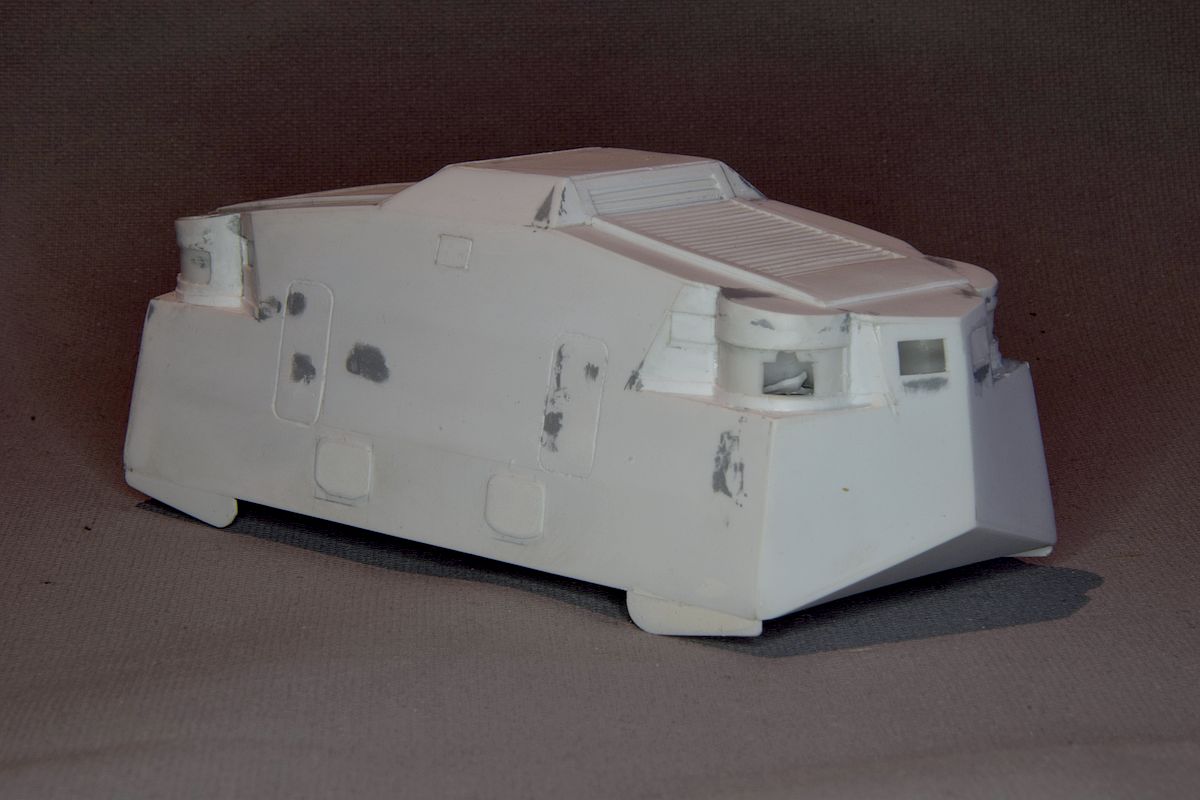
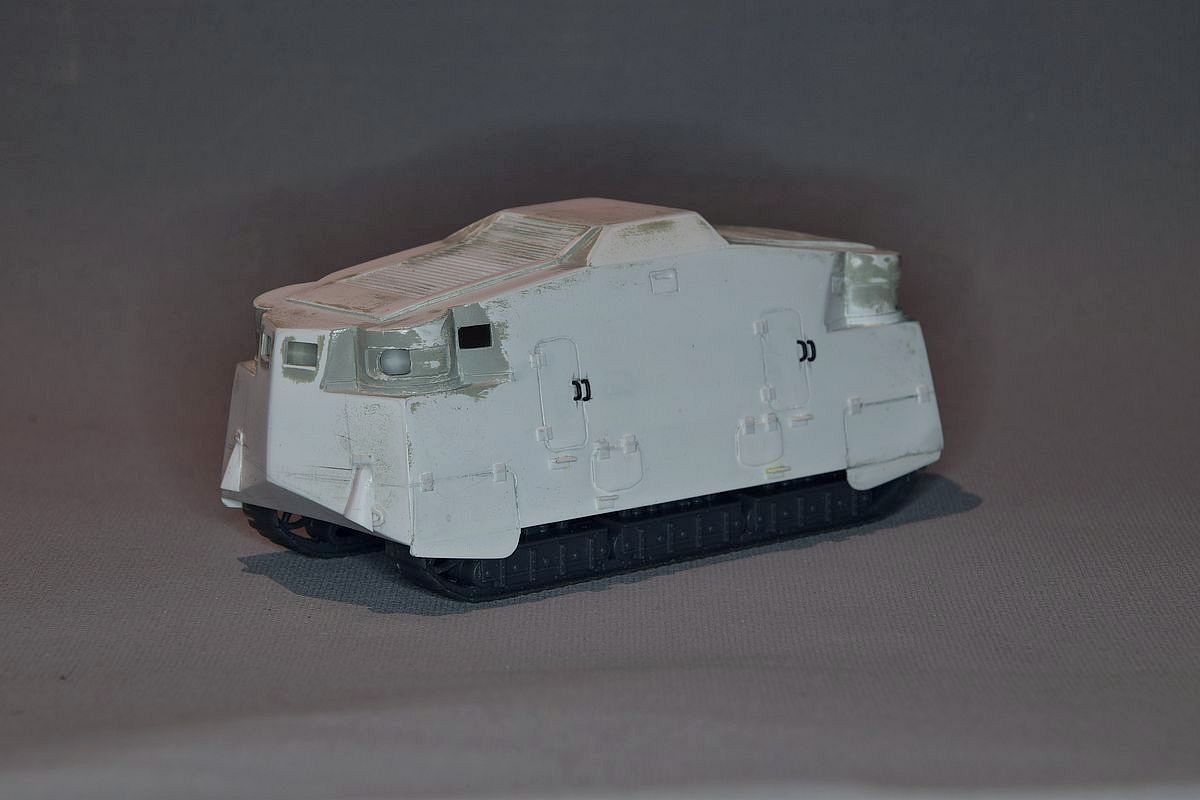
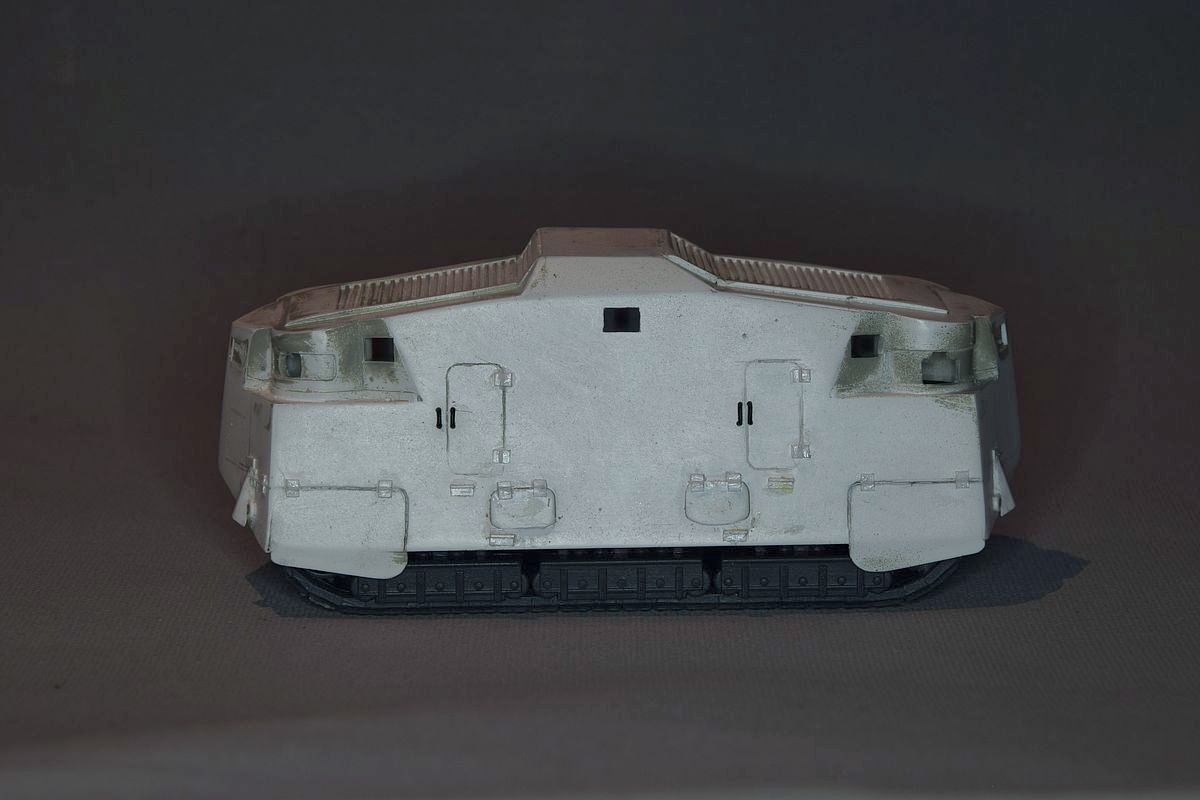
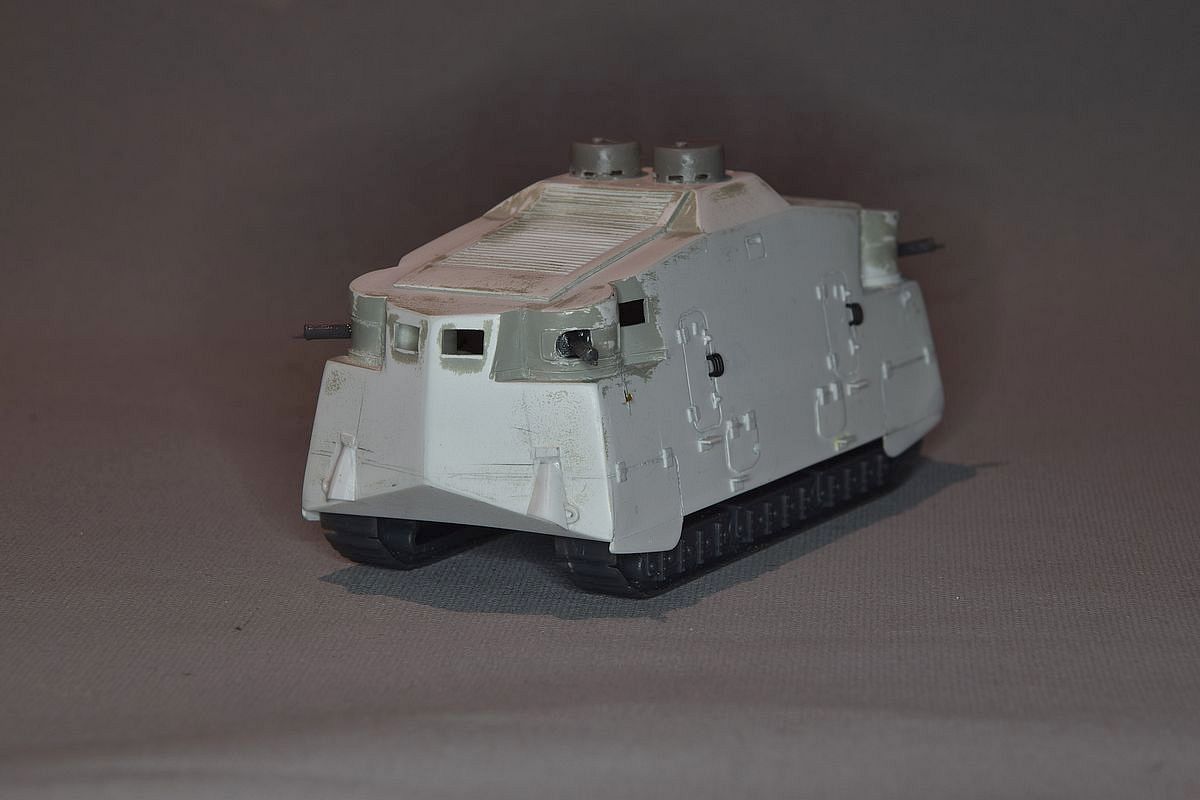
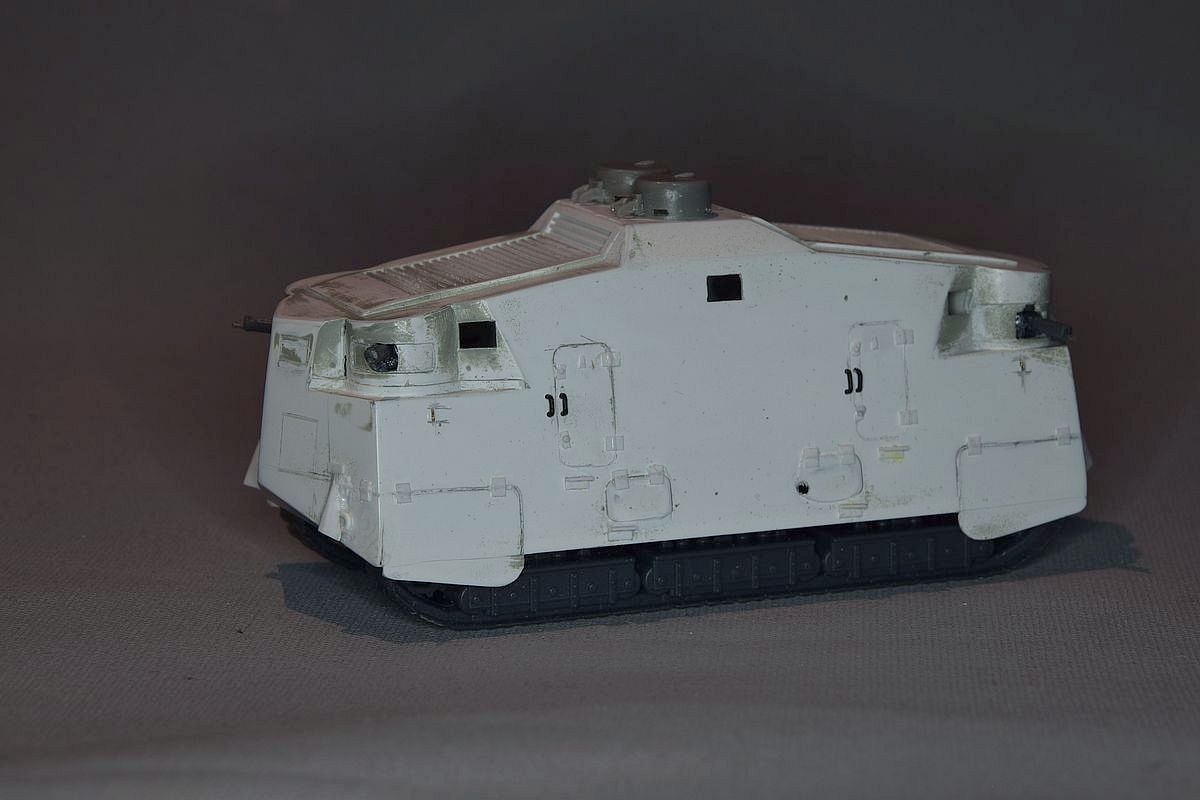
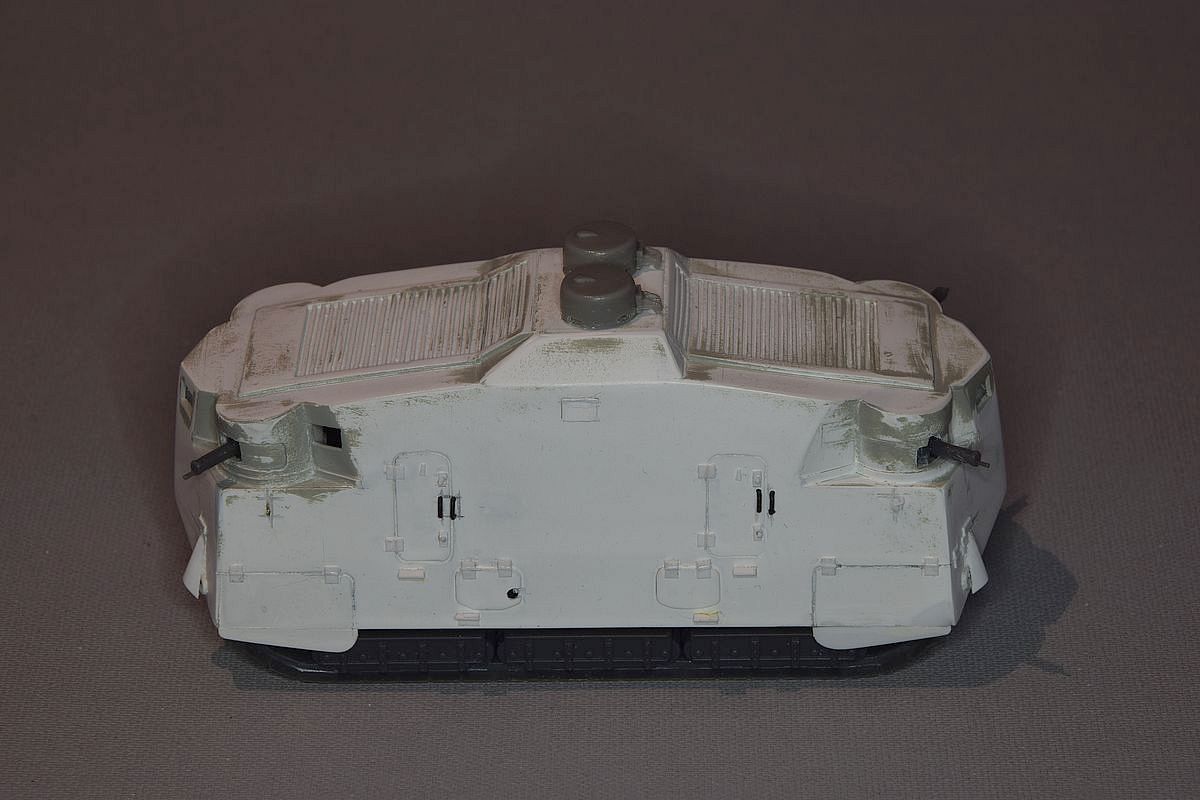
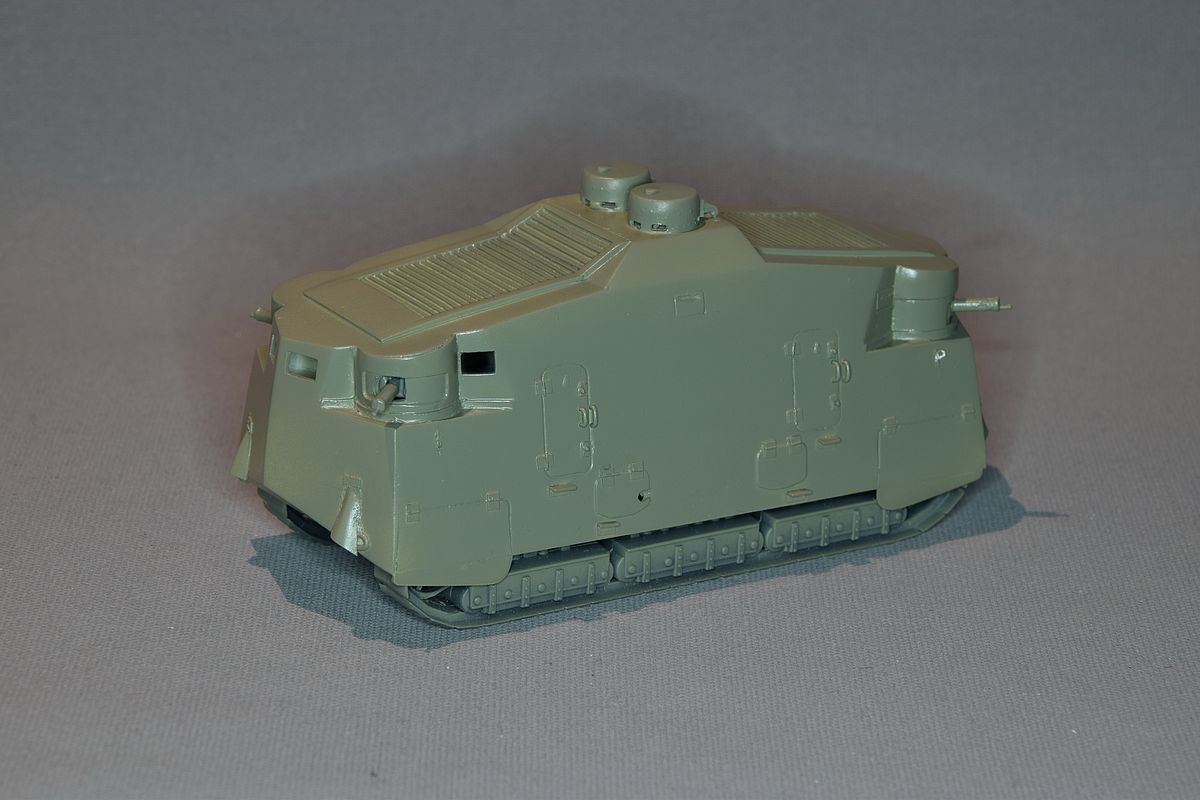
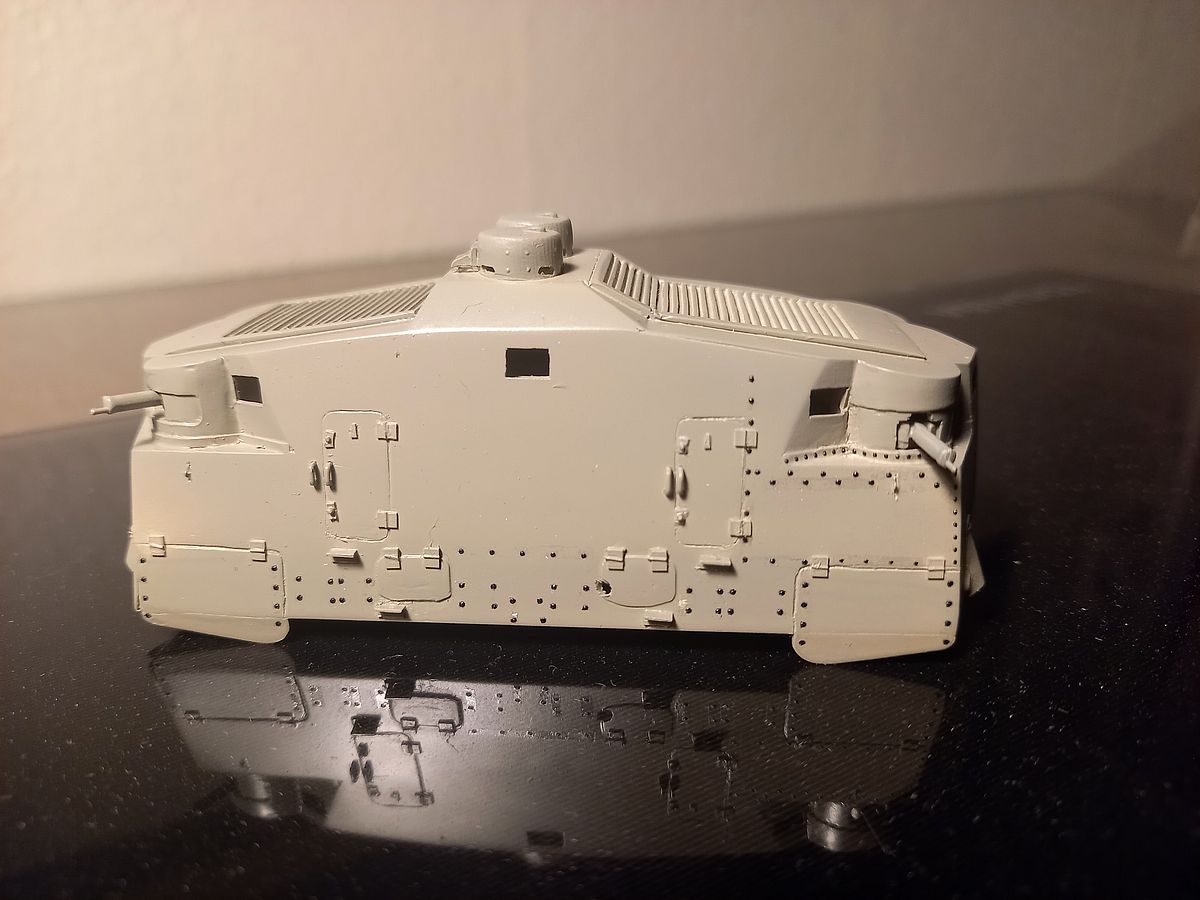
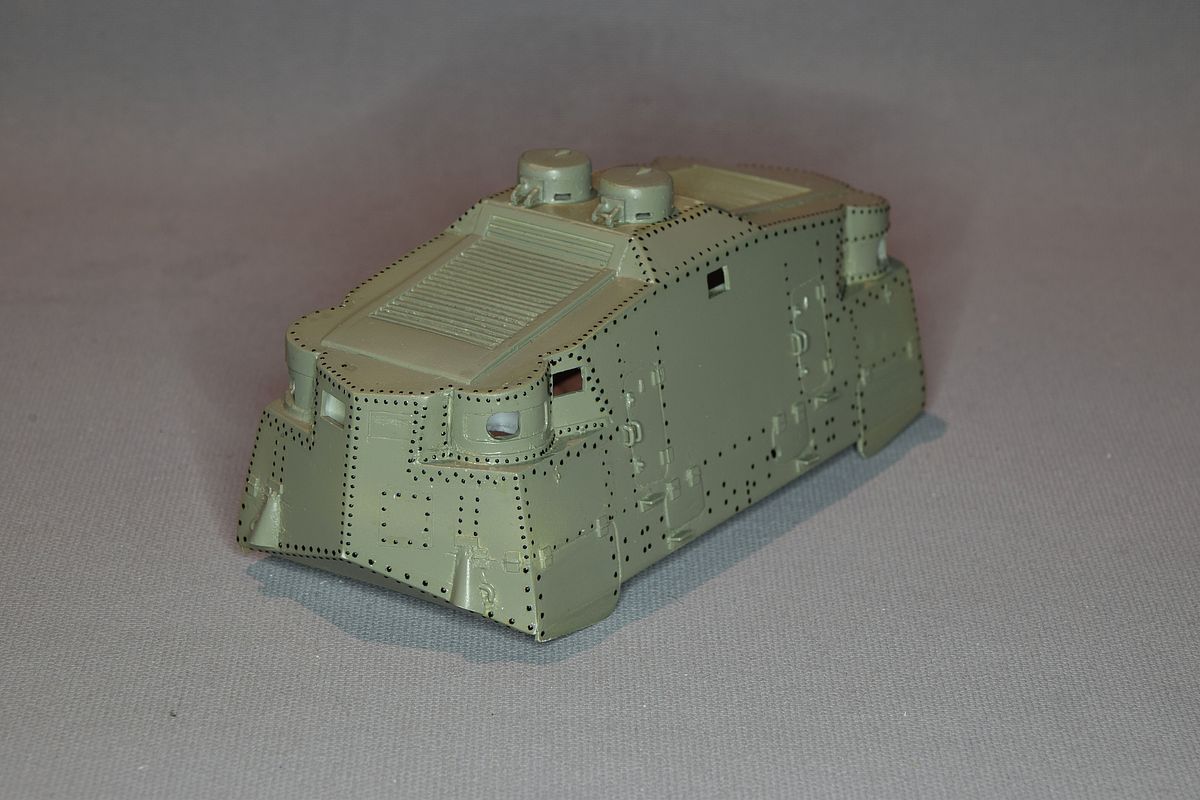
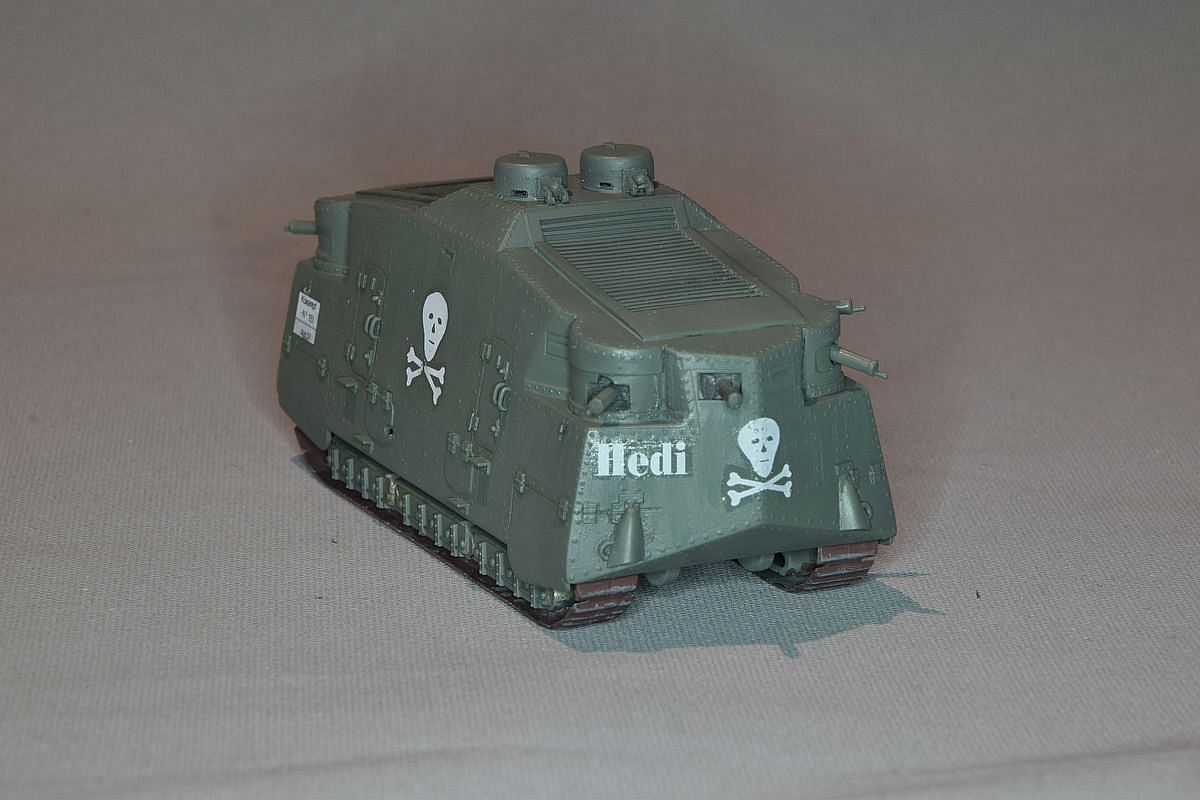
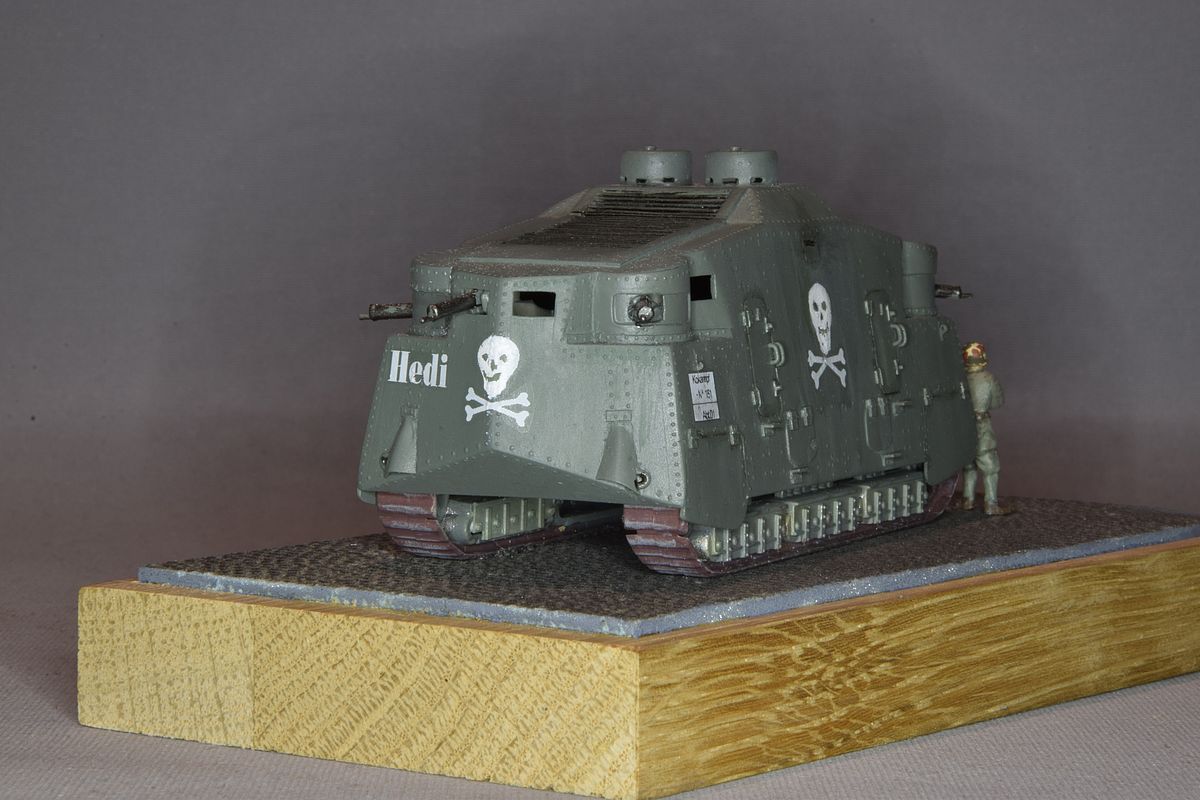
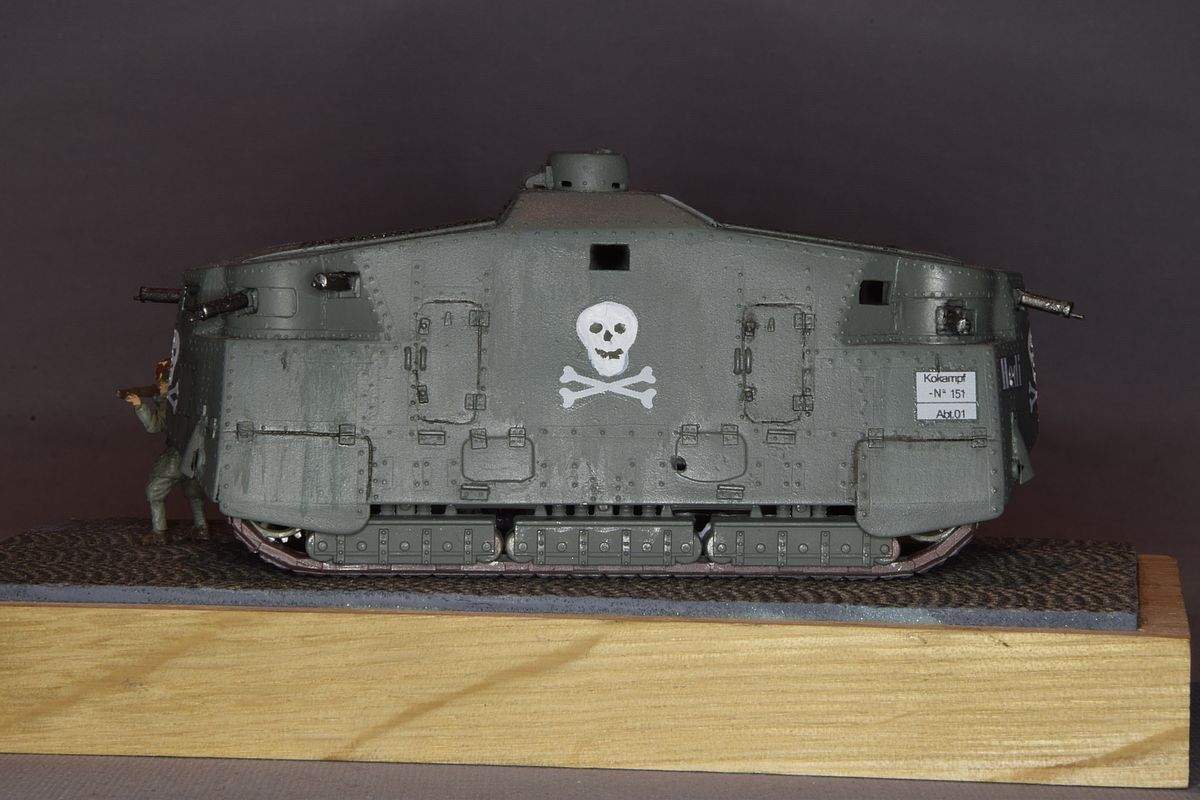
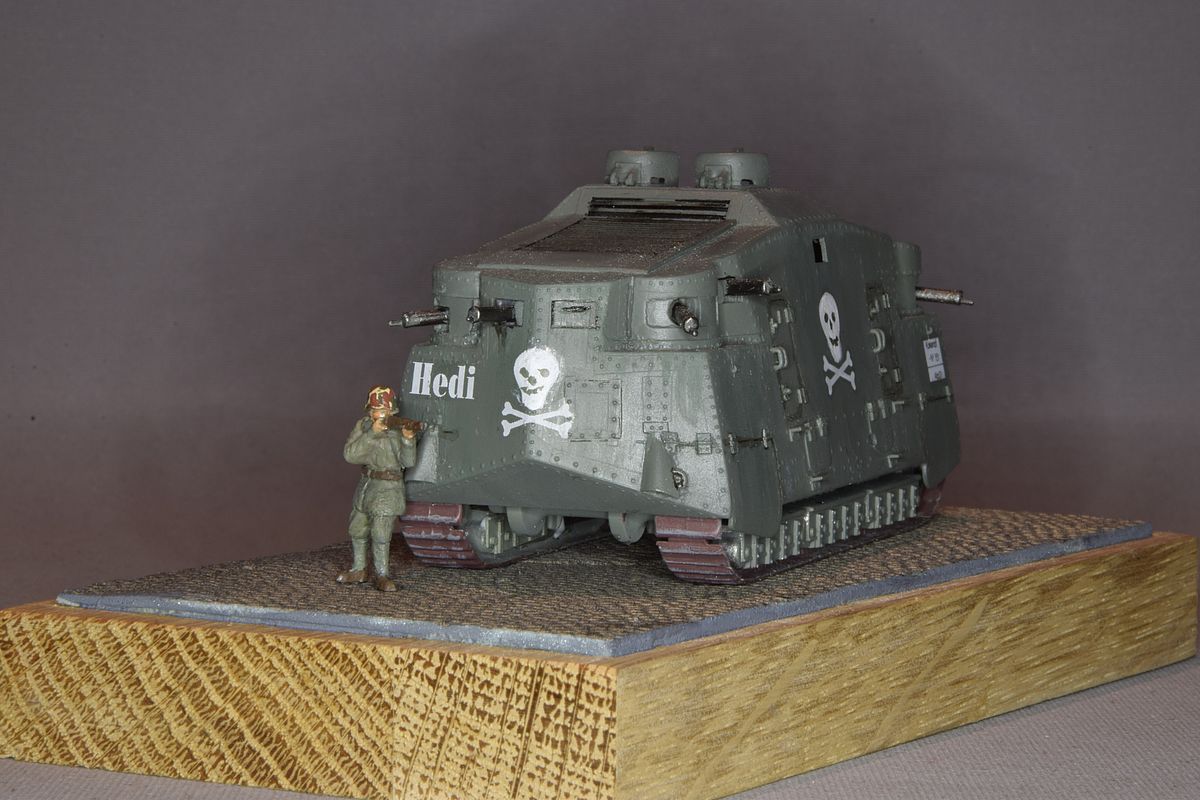
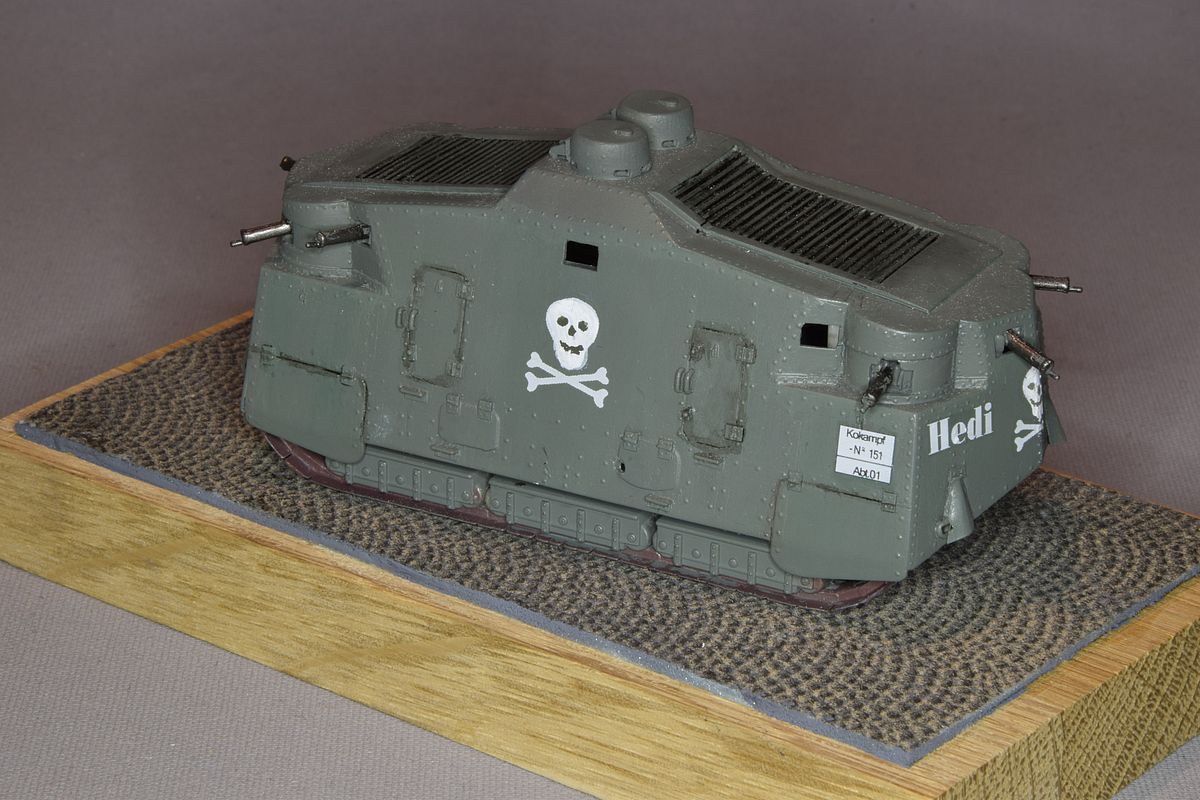
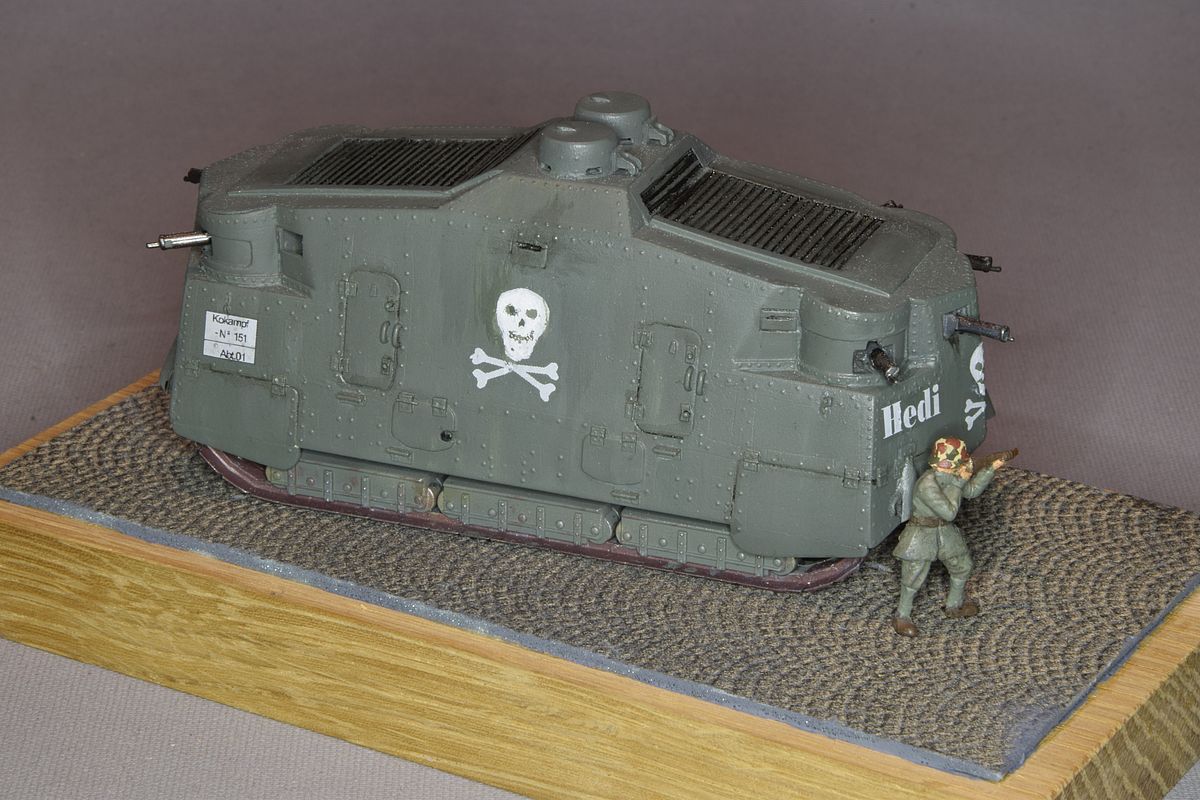
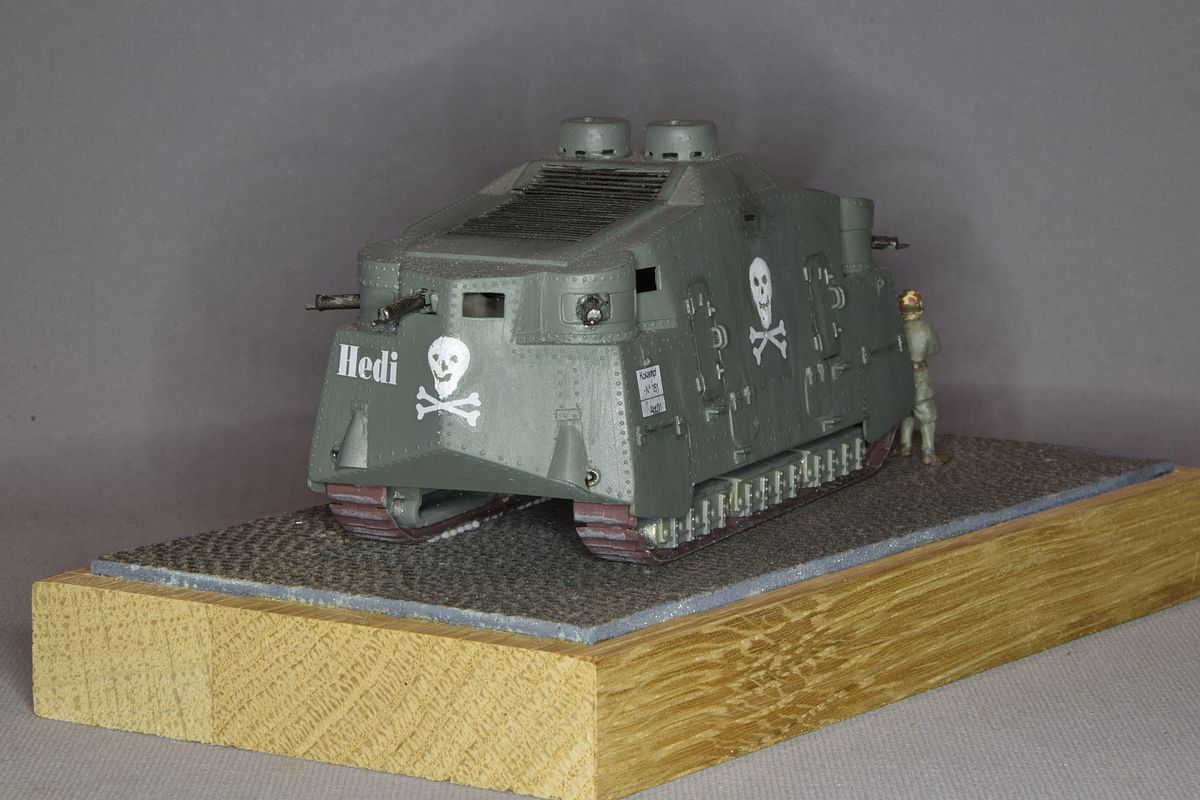
Nine month after I started I can put the first layer on paint on Hedi.


hedi_34.JPG
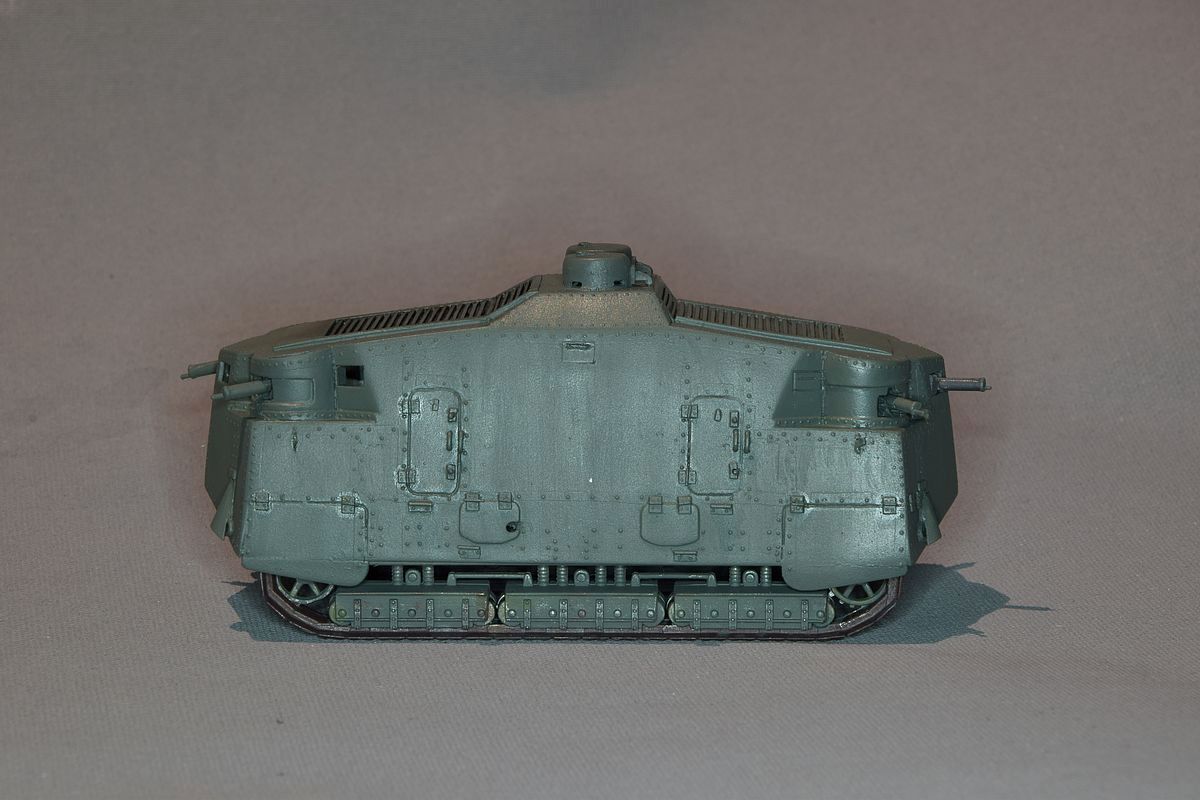
It is a good chance that I manages to finish it soon.
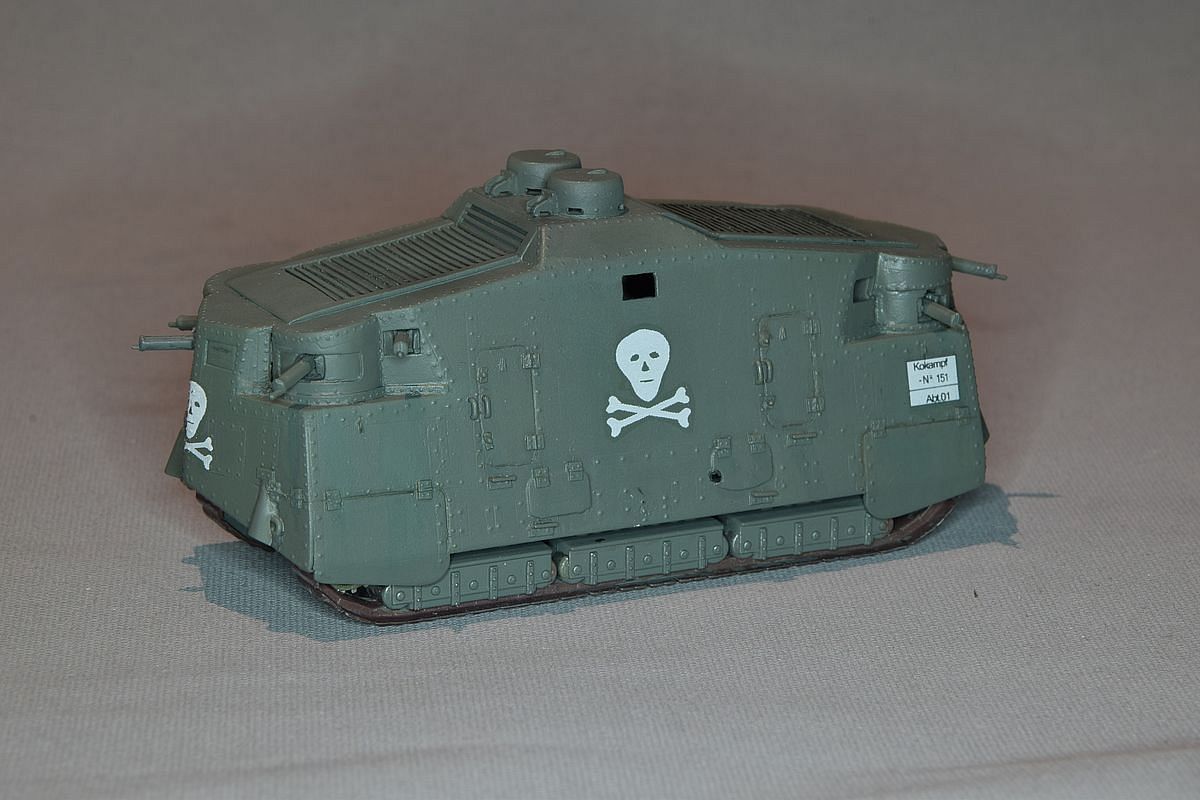


__________________

Björn

https://baecklund.eu/scalemodels/home.html


Captain

Status: Offline
Posts: 98
Date:
Permalink   

hedi_35.JPG

Project closed, not finished.

 hedi_36.JPG

The decals I bought doesn't even look something remotely close to the original: https://landships.activeboard.com/t64701690/a7v-hedi/

I could just as well used the kit that I started with. So I will not finish it. It goes down in a box until I figure out what to do (if I ever will)


__________________

Björn

https://baecklund.eu/scalemodels/home.html


Ned


Brigadier

Status: Offline
Posts: 292
Date:
Permalink   

Great work.. 


__________________


Captain

Status: Offline
Posts: 98
Date:
Permalink   

hedi_37.JPG

It has been standing on the table to long so i decided to do something.

hedi_38.JPGhedi_39.JPG

I just repainted the skulls ( very badly) and mounted the model on a small base.

hedi_40.JPGhedi_41.JPG

I have a couple more A7V kits to finish. Maybe I will repaint this then.


__________________

Björn

https://baecklund.eu/scalemodels/home.html


Captain

Status: Offline
Posts: 98
Date:
Permalink   

hedi_37a.JPG

The camera told me that the missing details on the inside of the bogie's is very visible. The standard A7V has flaps that hide this.


hedi_42.JPG

A quick build of some bogie sides was the fix.


__________________

Björn

https://baecklund.eu/scalemodels/home.html


Page 1 of 1  sorted by
 
Quick Reply

Please log in to post quick replies.

Tweet this page Post to Digg Post to Del.icio.us


Create your own FREE Forum
Report Abuse
Powered by ActiveBoard